Two weeks ago, a homeowner in a 1940s Ravenswood two-flat called me in a panic. She had ordered stock cabinets online, and when the installer showed up, three base cabinets were 2 inches too wide for her kitchen's angled wall — a classic mistake in older Chicago homes where no wall is perfectly square. The entire order had to be returned, costing her $1,800 in restocking fees and six weeks of delays. That project taught me, once again, that accurate measuring is the single most important step before ordering new cabinets.
Key Takeaways
- Measure every wall at least 3 times — at the floor, at 36 inches, and at 54 inches — because Chicago homes often have walls that are out of plumb.
- Always record the smallest measurement; cabinets can be shimmed but never squeezed.
- Document every obstruction: windows, pipes, electrical outlets, soffits, and radiators.
- A $30 laser measurer will save you hundreds in potential errors compared to a tape measure alone.
- Bring your measurements to a professional designer for verification before any order is placed.
Tools You Need Before You Start Measuring
Before you pull out a tape measure, gather everything you'll need so you don't have to stop mid-process. I've seen homeowners lose track of measurements because they kept running to the garage for supplies. Having the right tools on hand also improves accuracy — a laser distance measurer, for example, reduces human error by as much as 95% compared to a tape measure held by one person. You don't need professional-grade equipment, but you do need more than a dollar-store tape. Here's what I recommend for every DIY measuring session:
- 25-foot steel tape measure — the wider the blade, the less it sags over long runs
- Laser distance measurer — picks up discrepancies a tape misses (around $25–$40 at any hardware store)
- Graph paper — use a scale of 1 square = 6 inches for easy sketching
- Level (48-inch) — to check if floors and walls are plumb and level
- Pencil and eraser — never measure in pen; you will revise
- Stepladder — to measure soffit heights and upper wall dimensions
- Camera or smartphone — photograph every wall, corner, and obstruction
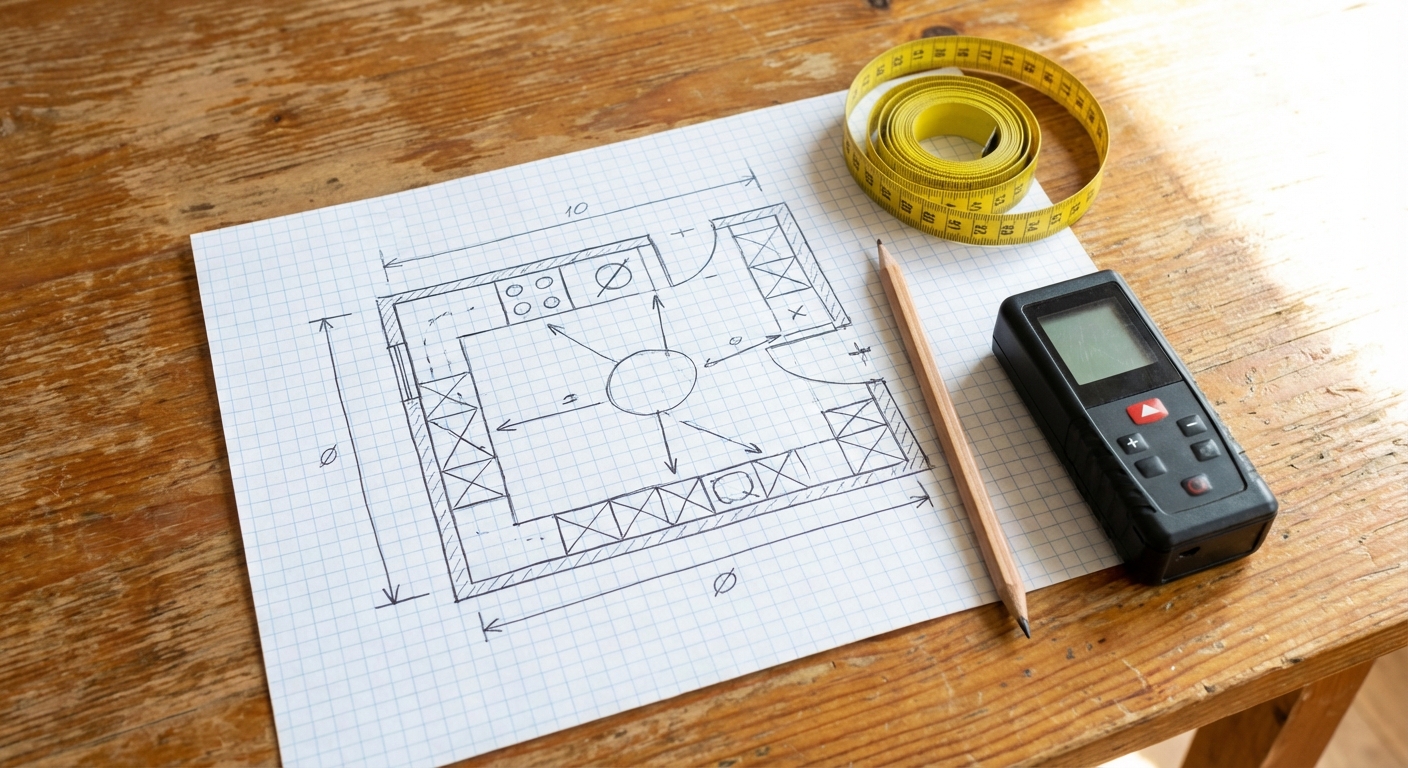
Step 1: Draw a Rough Floor Plan
Start by sketching your kitchen's basic shape on graph paper. Don't worry about exact measurements yet — focus on capturing the overall layout, including doorways, window openings, and any jogs in the walls. In many Chicago bungalows and greystones, kitchens have irregular shapes: a bump-out for a radiator, an angled wall where a pantry was added decades ago, or a soffit that drops 12 inches from the ceiling. Mark every single one of these features on your sketch because they directly affect custom kitchen cabinet design and layout. Label each wall with a letter (A, B, C, D) so you can organize your measurements later. I also recommend drawing arrows to indicate the direction you measured, which prevents confusion when you hand the sketch to a designer. If your kitchen has an island or peninsula, draw it as a separate element with its own dimensions.
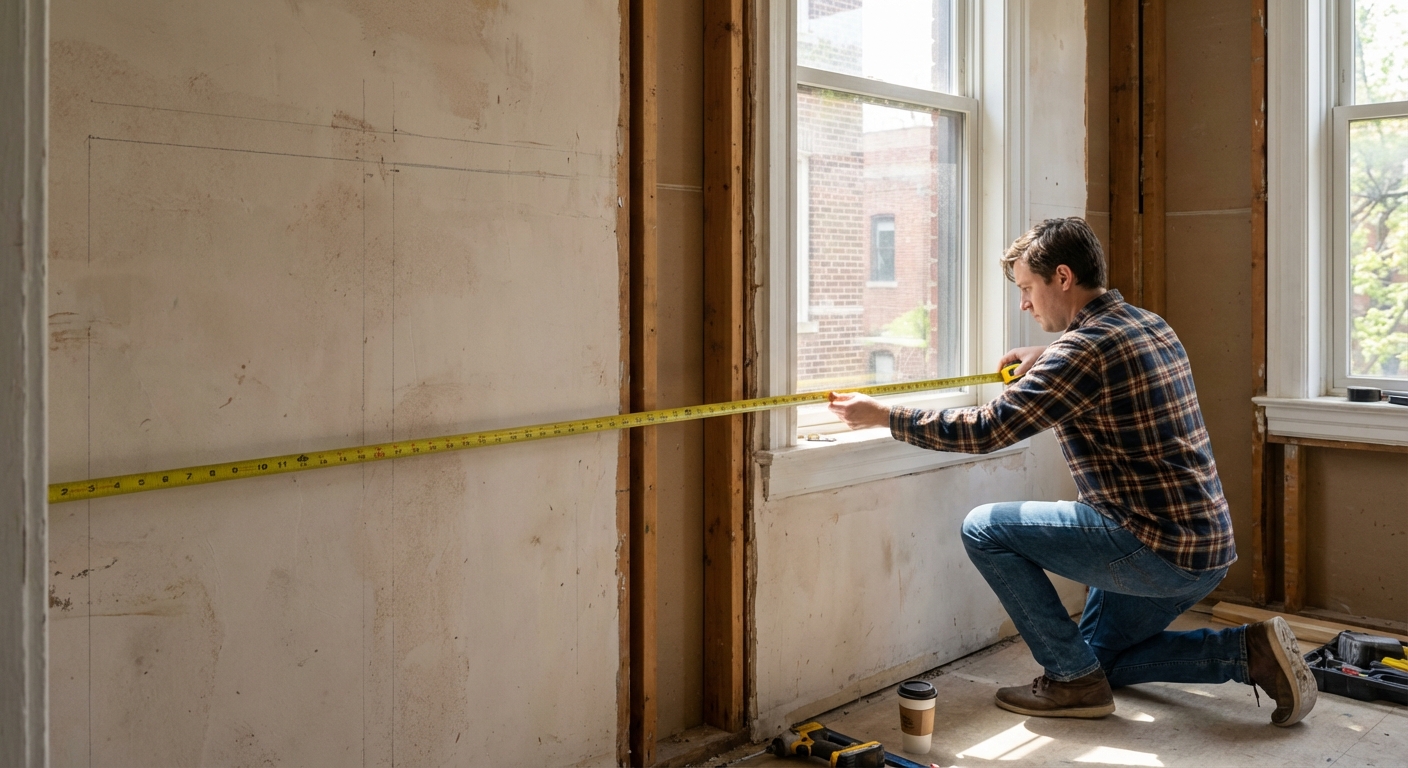
Step 2: Measure Every Wall — Three Times
This is where most DIY mistakes happen. In new construction, walls are typically plumb and square, but in Chicago homes built before 1960, I routinely see walls that are off by ½ inch to 1½ inches from floor to ceiling. That's why I tell every client to measure each wall at three heights: at the floor, at 36 inches (countertop height), and at 54 inches (upper cabinet zone). Record all three numbers on your sketch, and always use the smallest measurement as your working dimension. Cabinets can be shimmed to fill small gaps, but they cannot be compressed to fit a too-tight space. This is especially important for the standard kitchen cabinet dimensions that determine your entire layout. Measure corner to corner, and then measure from each corner to the nearest obstruction — a window casing, a doorframe, a pipe chase. If you're measuring an L-shaped or U-shaped kitchen, measure each leg separately and then measure the diagonal to confirm squareness.
| Measurement Point | Height from Floor | What It Tells You |
|---|---|---|
| Floor-level wall width | 1 inch | Base cabinet fit and toe kick alignment |
| Counter-height wall width | 36 inches | Where base cabinets and countertops will sit |
| Upper cabinet zone width | 54 inches | Wall cabinet placement and alignment |
| Ceiling height | Floor to ceiling | Determines tall cabinet and soffit options |
| Soffit depth (if present) | Ceiling to soffit bottom | Upper cabinet height limit |
Need expert advice? Call (224) 808-5100 or schedule a free kitchen design consultation.
Step 3: Record All Windows, Doors, and Openings
Every window and door in your kitchen affects cabinet placement, and missing even one measurement can derail a project. For each window, measure the total opening width (casing to casing), the height of the sill from the floor, and the height of the top casing from the floor. For doors, measure the width of the opening including trim and note which direction the door swings — a left-swing door that opens into the kitchen may block a potential cabinet run. In vintage Chicago condos, I often encounter pass-through openings between the kitchen and dining room that homeowners forget to measure. Record the distance from each window or door to the nearest corner, because this determines filler panel sizes and where your cabinet run can begin and end. If you're considering replacing a window during your renovation, measure the rough opening behind the trim as well — this gives your designer flexibility to shift the layout.
Step 4: Map Every Obstruction and Utility Location
Obstructions are the hidden killers of kitchen cabinet projects, especially in older Chicago homes where plumbing and electrical were often retrofitted. Measure and mark the exact location of every electrical outlet, light switch, gas line, water supply valve, drain pipe, and vent hood duct. Note the center point of each obstruction, its height from the floor, and its distance from the nearest wall corner. In pre-war greystones, I commonly see cast-iron drain stacks running through the kitchen wall — these cannot be moved without major plumbing work, so your cabinet layout must accommodate them. Radiators and baseboard heaters are another Chicago-specific challenge; if you have a radiator on a kitchen wall, measure its width, depth from the wall, and height carefully. All of these details matter when designing custom cabinets that fit any room's constraints. According to the National Kitchen and Bath Association (NKBA), failure to account for utility locations is among the top five causes of kitchen renovation delays nationwide.
Step 5: Measure Ceiling Height and Soffits
Ceiling height determines whether you can install 42-inch upper cabinets, stack cabinets to the ceiling, or whether you'll need crown molding to close a gap. Measure the ceiling height in at least four spots — both corners and two mid-wall points — because floors and ceilings in older homes are rarely perfectly level. In Chicago two-flats, I've measured ceiling heights that vary by as much as 1¾ inches across a single 12-foot kitchen wall. If your kitchen has soffits (the boxed-in area between the top of the upper cabinets and the ceiling), measure the soffit's depth from the wall and its height from the floor. Some homeowners choose to remove soffits to gain space for taller uppers, but be aware: Chicago soffits often conceal ductwork, electrical wiring, or structural headers that cannot be easily relocated. If you're planning a floor-to-ceiling pantry or custom closet-style storage in your kitchen, ceiling measurements become even more critical because even a ¼-inch error can prevent a tall cabinet from fitting.
| Chicago Home Style | Typical Ceiling Height | Common Measuring Challenge |
|---|---|---|
| Pre-war greystone | 9–10 feet | Uneven plaster, crown molding, soffits hiding pipes |
| 1940s–1960s bungalow | 8 feet | Low soffits, radiator pipes in walls |
| Modern condo (2000+) | 8.5–9 feet | Sprinkler heads, HVAC bulkheads |
| Two-flat (upper unit) | 8–9 feet | Sloped floors, uneven ceiling planes |
Step 6: Check for Square Corners
Assuming your kitchen corners are perfect 90-degree angles is one of the most expensive assumptions a homeowner can make. To check, use the 3-4-5 triangle method: measure 3 feet along one wall from the corner, 4 feet along the adjacent wall, and then measure the diagonal between those two points. If the diagonal is exactly 5 feet, your corner is square. If it's off, note the discrepancy — your cabinet designer needs this information to plan filler strips and angled pieces. In kitchens I manage across Chicagoland, roughly 7 out of 10 older homes have at least one corner that's out of square by ¼ inch or more. This matters most for L-shaped and U-shaped kitchens where base cabinets meet in a corner, because a gap or overlap at the corner affects the entire run. Corner cabinets equipped with Blum hardware like lazy Susan hinges need precise corner measurements to function correctly. Don't skip this step — it takes 5 minutes and can save you weeks of headaches.
Step 7: Measure Existing Appliance Locations
If you're keeping your current appliances, measure each one's width, height, and depth, and mark its exact position on your floor plan. Standard appliance widths — 30 inches for a range, 36 inches for a refrigerator, 24 inches for a dishwasher — are guidelines, not guarantees. I've measured plenty of "standard" refrigerators in Lincoln Park condos that were actually 33 inches or 35 inches wide. Also measure the distance from each appliance to the nearest wall and to adjacent appliances, because building codes require minimum clearances for safety. If you're upgrading to a new appliance, get the exact specs from the manufacturer's website before measuring; don't assume your new fridge will fit where the old one sat. For bathroom vanity projects, I follow the same principle — always measure the fixture before designing the cabinetry around it. Note the location of appliance connections (gas lines, water lines, electrical outlets) because these dictate placement even more than the cabinet layout does.
Common Measuring Mistakes I See in Chicago Kitchens
After managing 1,300+ completed projects at AK Cabinet Craft, our team has seen every measuring error imaginable. The most common is measuring wall-to-wall but forgetting to account for existing trim or baseboard that will stay in place. Another frequent mistake is measuring only the floor dimensions without checking upper walls — in a vintage Wicker Park two-flat last year, a client's upper wall was 1¼ inches narrower than the floor measurement due to an old plaster patch. Homeowners also forget to measure the depth of window sills, which can interfere with countertop depth or prevent upper cabinets from opening fully. Rounding measurements is another budget killer: always record to the nearest ⅛ inch, never round up or down to the nearest inch. Finally, many people measure their kitchen once and assume the numbers are permanent — but if you're doing demolition, drywall repair, or plumbing work before cabinets arrive, those dimensions will change. Always do a final verification measurement after all prep work is complete, ideally with your custom built-in cabinetry specialist present.
- Not measuring at multiple heights on each wall
- Forgetting window sill depth and casing thickness
- Ignoring soffits and ductwork above upper cabinets
- Rounding to the nearest inch instead of ⅛ inch
- Skipping the corner squareness check
- Measuring only once instead of verifying after demo and prep work
Frequently Asked Questions
How long does it take to measure a kitchen for new cabinets?
For a typical Chicago kitchen of 100–150 square feet, I tell homeowners to budget 1 to 2 hours for a thorough DIY measurement session. That includes drawing your floor plan, taking all wall and ceiling measurements at multiple heights, and photographing every detail. Rushing through it in 20 minutes is how costly errors happen.
Can I measure my kitchen myself, or should I hire a professional?
You absolutely can do the initial measurements yourself using this guide — and I encourage it because it helps you understand your space. However, I always recommend having a professional designer verify your measurements before any cabinets are ordered. At AK Cabinet Craft, our design consultations include professional measurement verification at no extra charge.
What's the most common measuring mistake in older Chicago homes?
It's assuming the walls are straight and the corners are square. In homes built before 1960, walls can bow, lean, or taper by over an inch. I always tell clients to measure at three heights and use the smallest number. That single habit would prevent about 80% of the fit problems I've seen over my career.
Do I need to remove old cabinets before measuring for new ones?
No — you can measure with existing cabinets in place. Measure the walls you can access, and note where the current cabinets sit. Once demolition happens, do a second round of measurements on the bare walls. Our team at AK Cabinet Craft always does a final field measure after demo before we start our 21-day production cycle.
How accurate do my measurements need to be?
I require measurements accurate to ⅛ inch. Anything less precise risks gaps, misalignment, or cabinets that simply don't fit. A ¼-inch error might sound small, but across a 10-foot wall with six cabinets, those errors compound quickly. Precision at the measuring stage is free; fixing mistakes after production is not.
Ready to Get Started?
Accurate measurements are the foundation of every successful kitchen cabinet project — but you don't have to do it alone. At AK Cabinet Craft, our team has completed 1,300+ projects across Chicagoland, and every one starts with a precise, professional measurement and design session. We build custom kitchen cabinets starting from $15,000 with 21-day production, Blum Austrian hardware, and a 5-year warranty. Bring your DIY measurements to us and we'll verify every number before a single board is cut. Schedule a free kitchen design consultation or call (224) 808-5100 — let's make sure your project starts right.